


Installation Guide
Aluminium Venetian Blinds
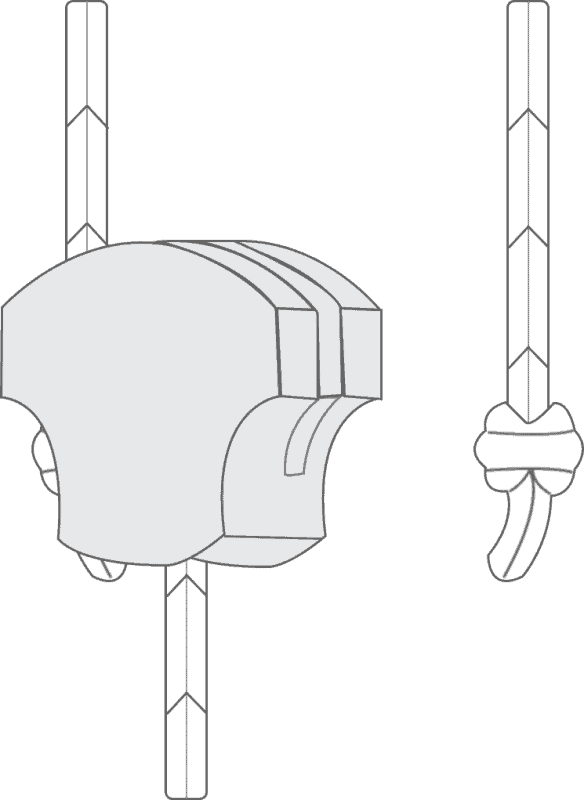
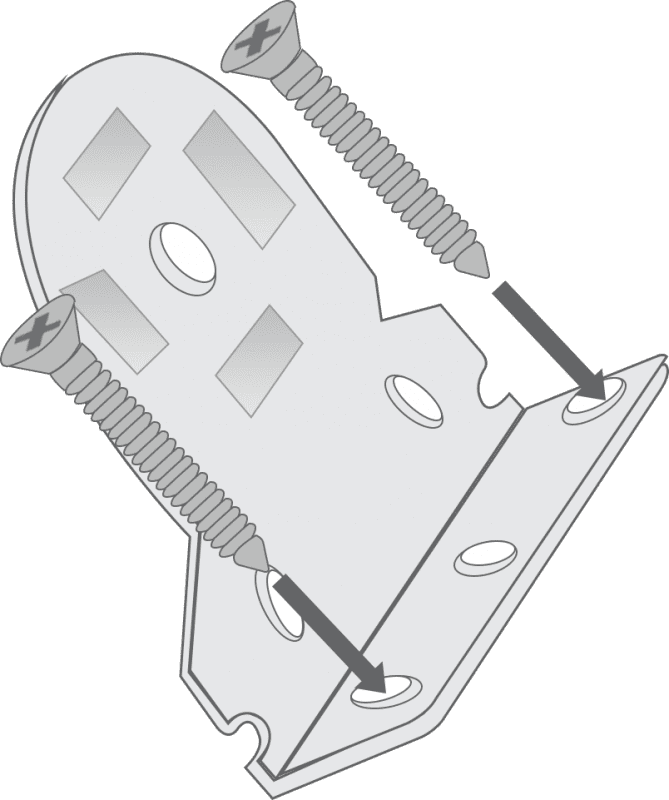
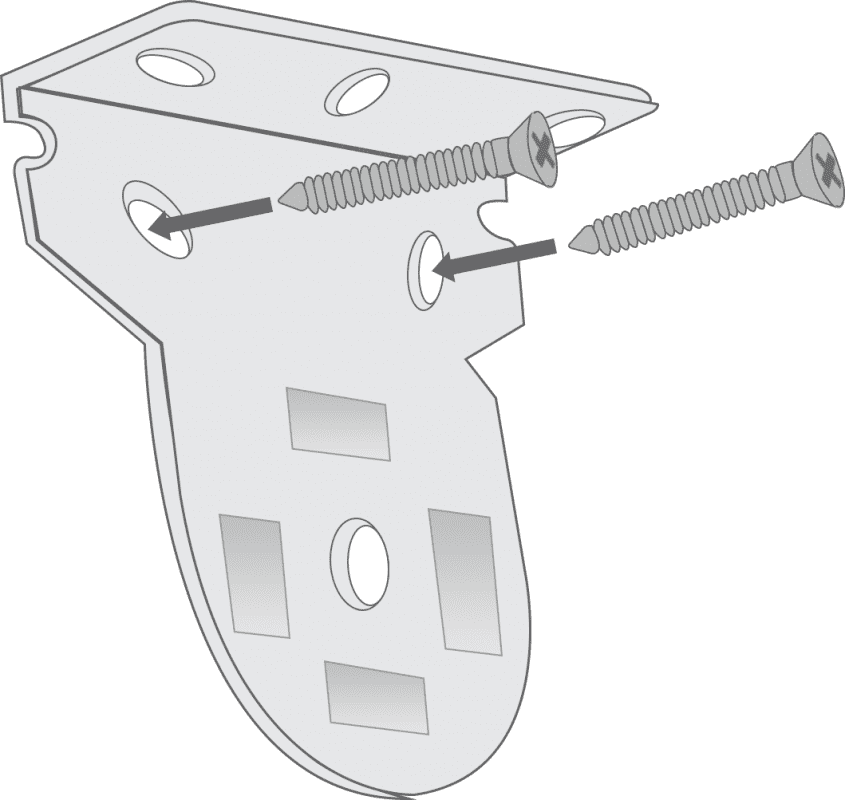
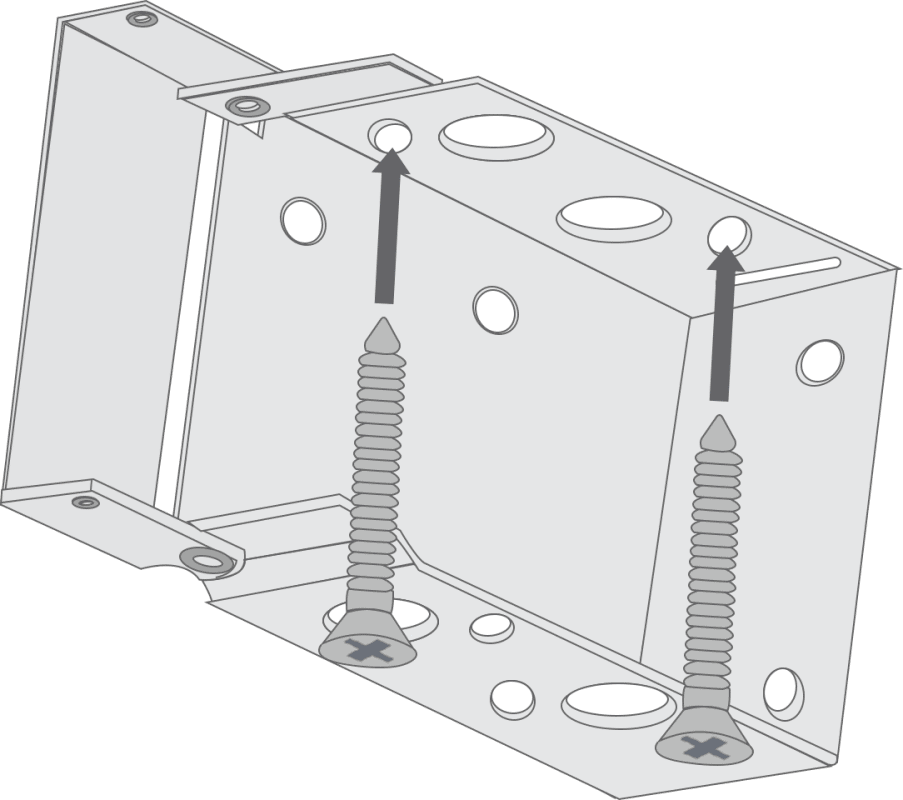
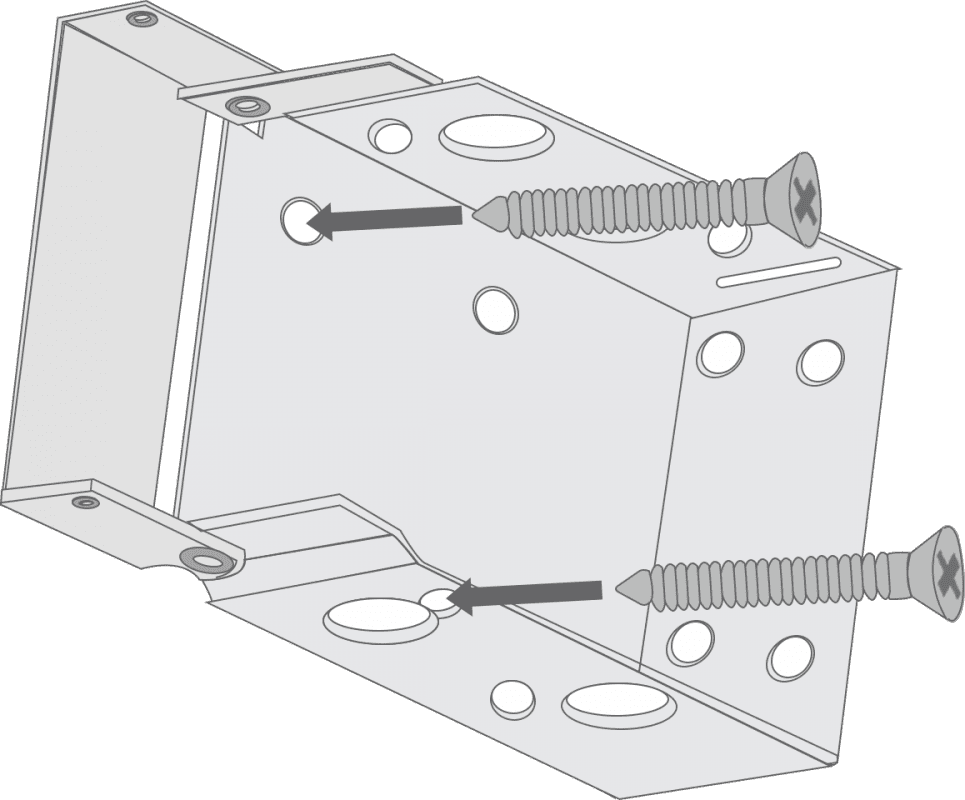
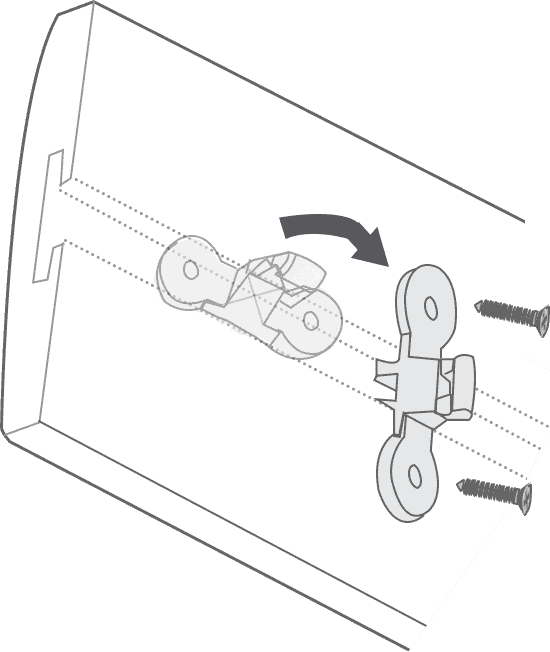
Fitting the brackets Step 1
The brackets offer two methods of installation:
Top-Fixing
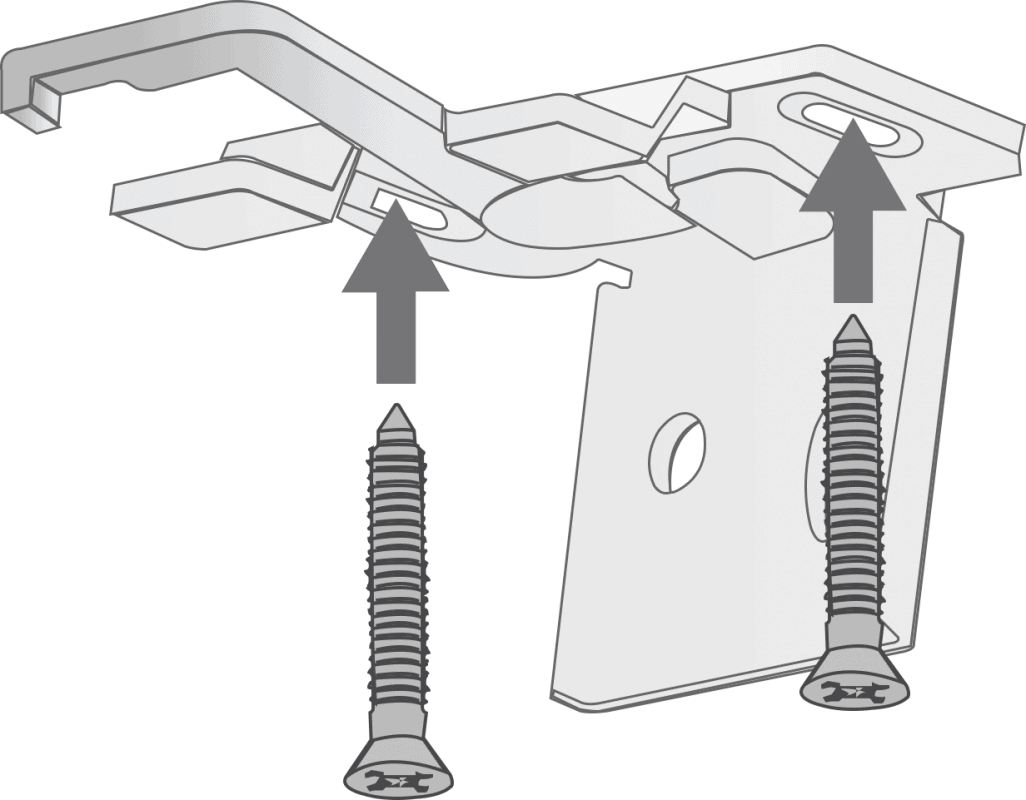
Where the brackets are screwed into the lintel (or ‘ceiling’ of the recess)
Face-Fixing
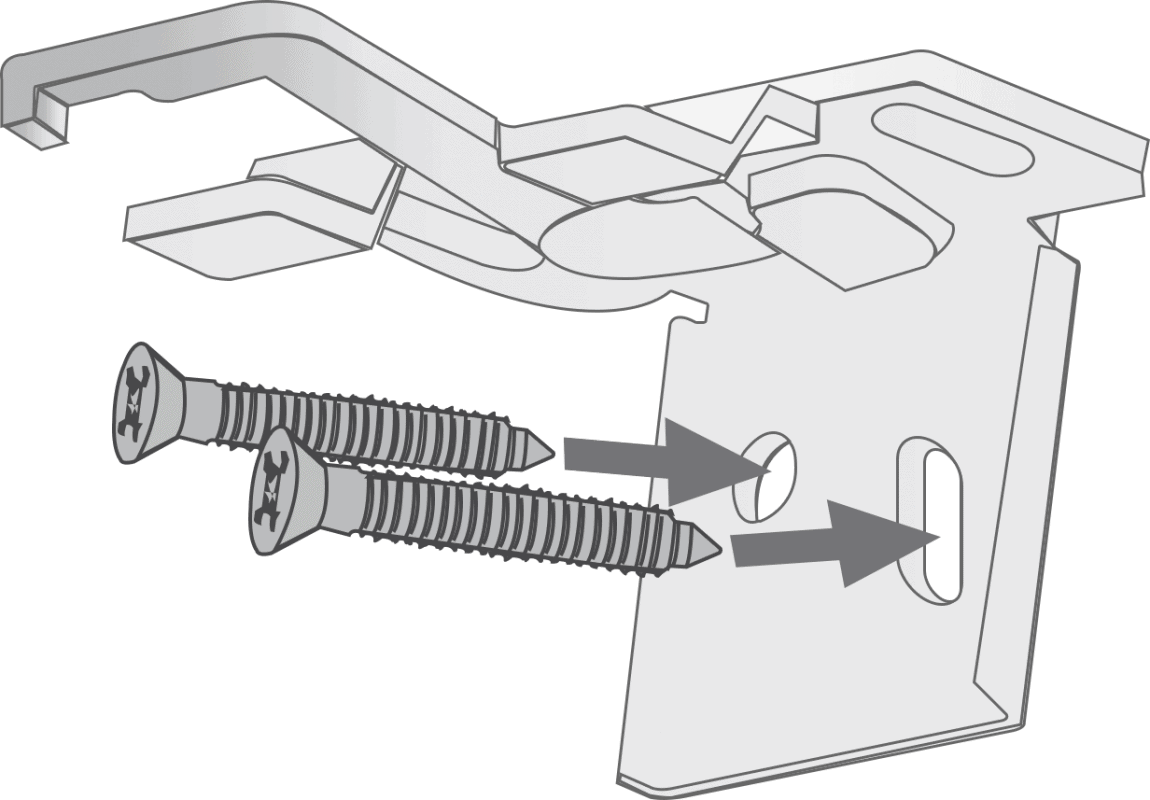
Where the brackets are screwed onto a facing surface (a wall or window frame)

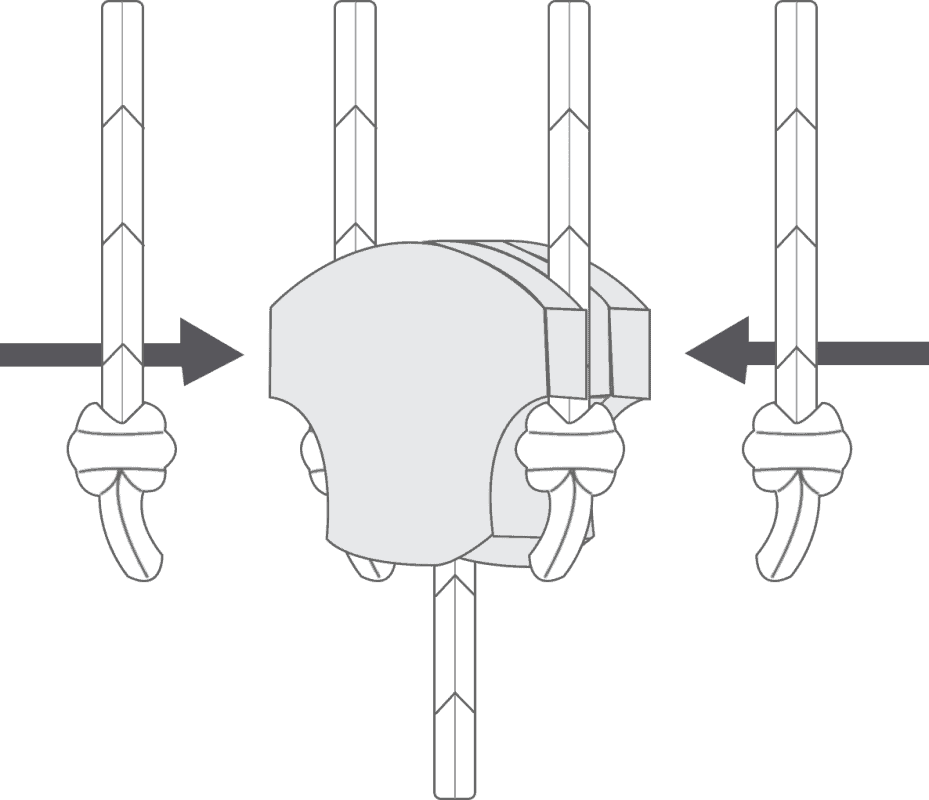
The outermost brackets should be mounted at least 5cm in from the ends of the blind.

The remainder of the brackets should be spaced evenly along the width of the blind, ensuring that they do not interfere with any of the moving components in the headrail.
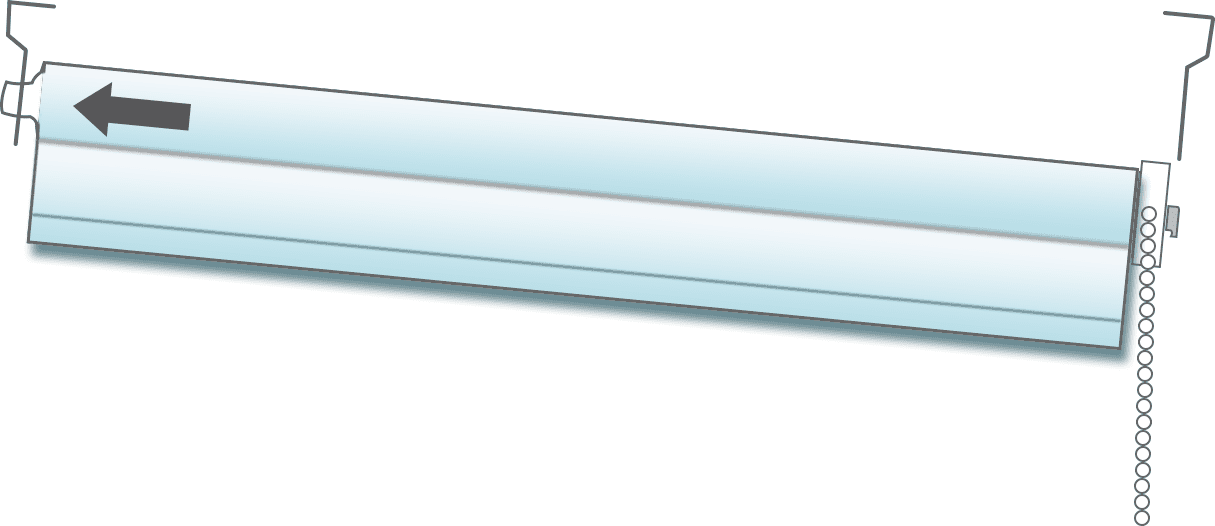
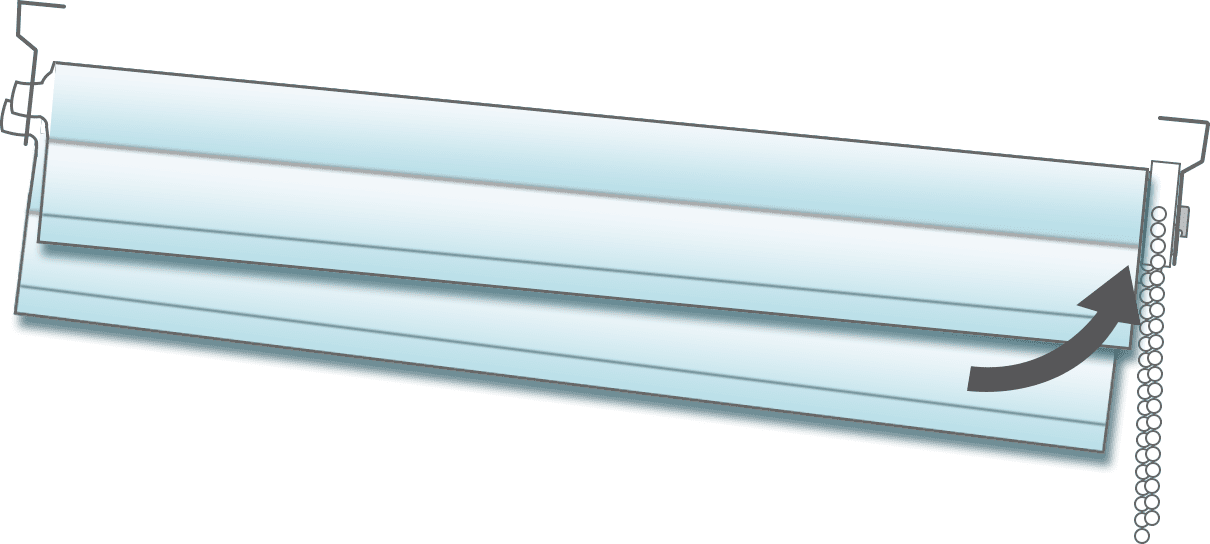
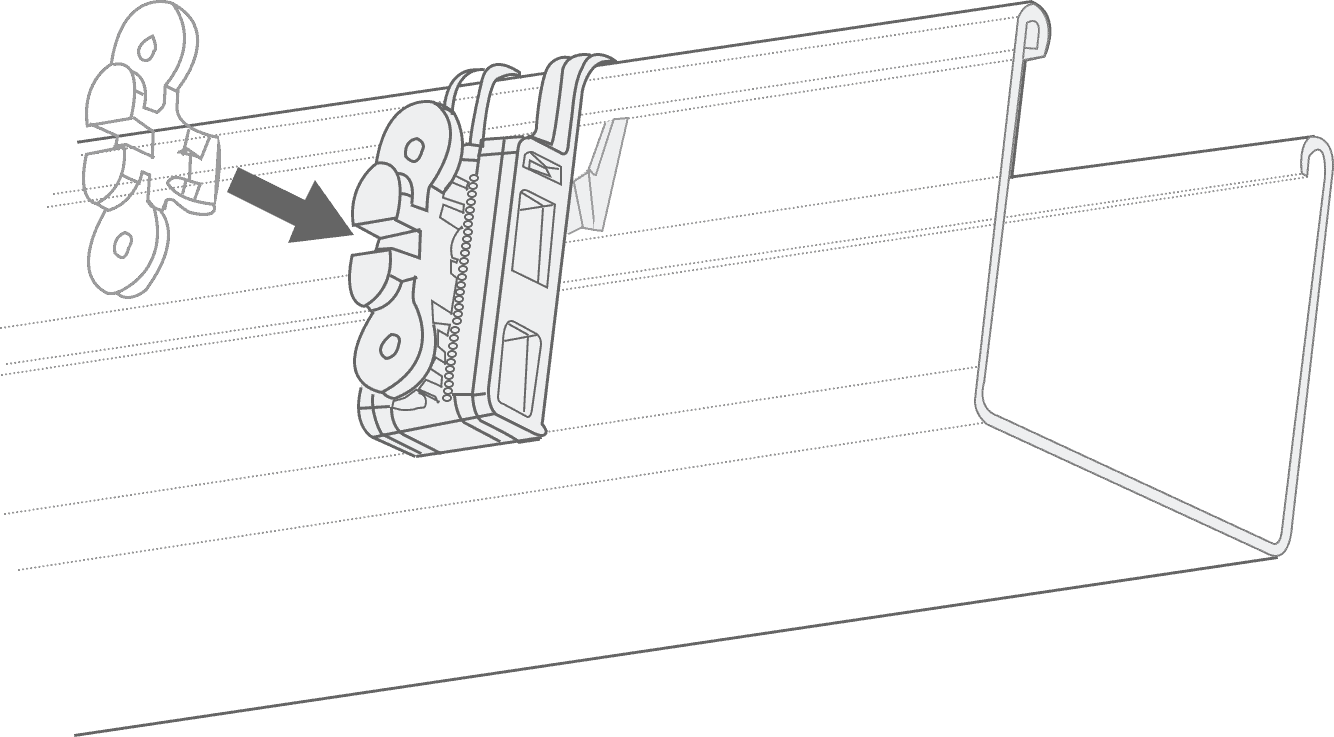
Fitting the blind Step 2
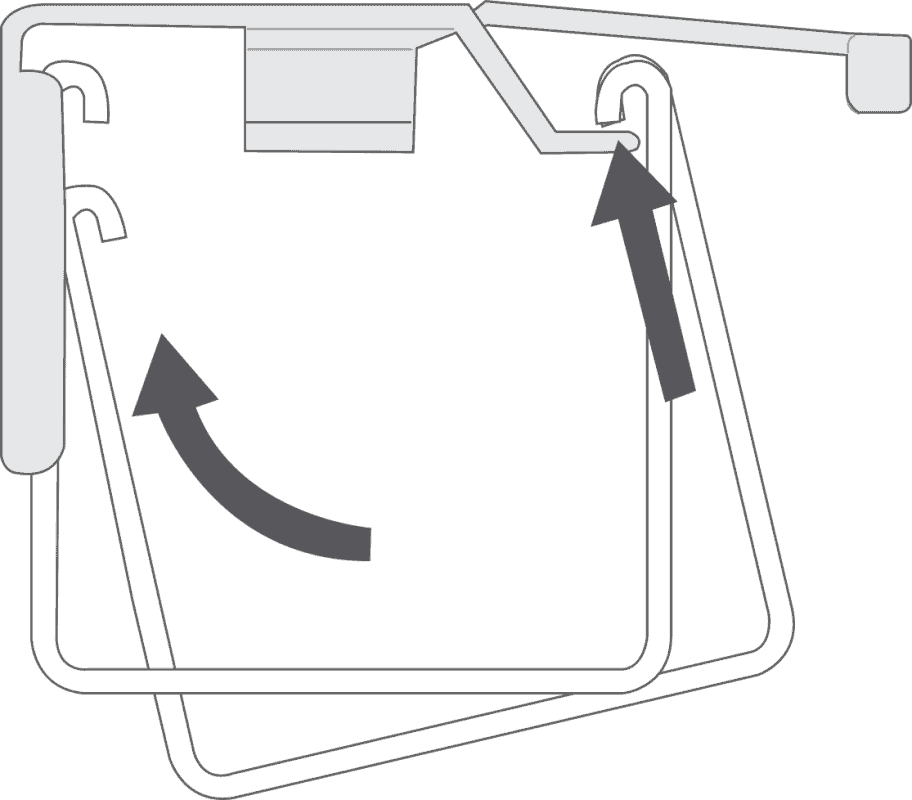

Hook the front lip of the headrail over the protruding hooks at the front of the bracket, then raise the back of the headrail so that it’s level. Holding it in this position, swing the swing-arm over and press it firmly against the headrail to lock it in place.
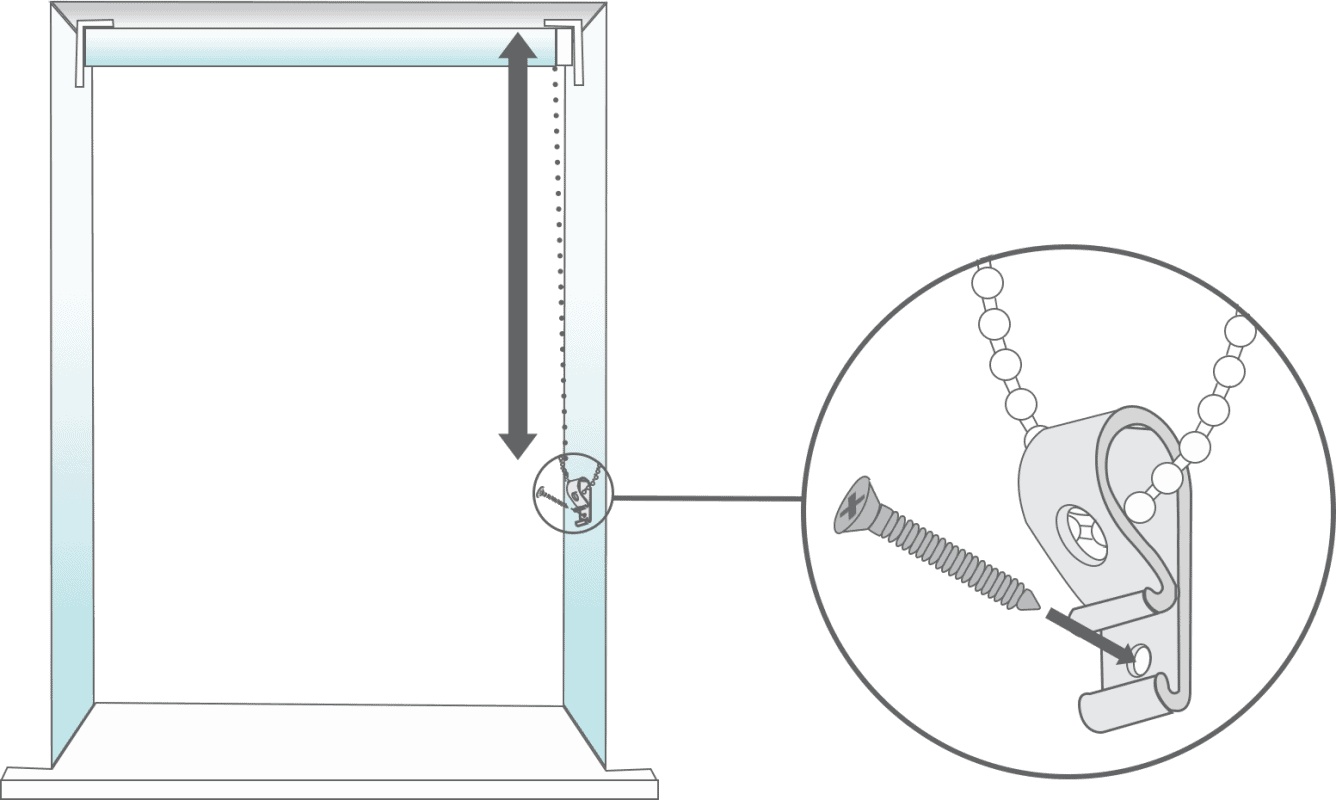
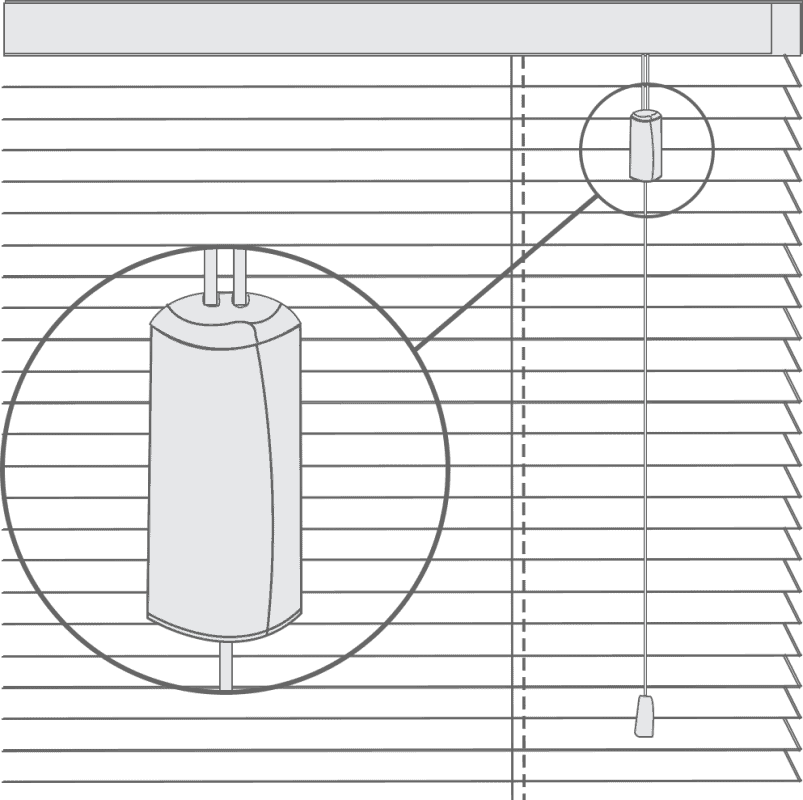
Child Safety Step 3
Cord
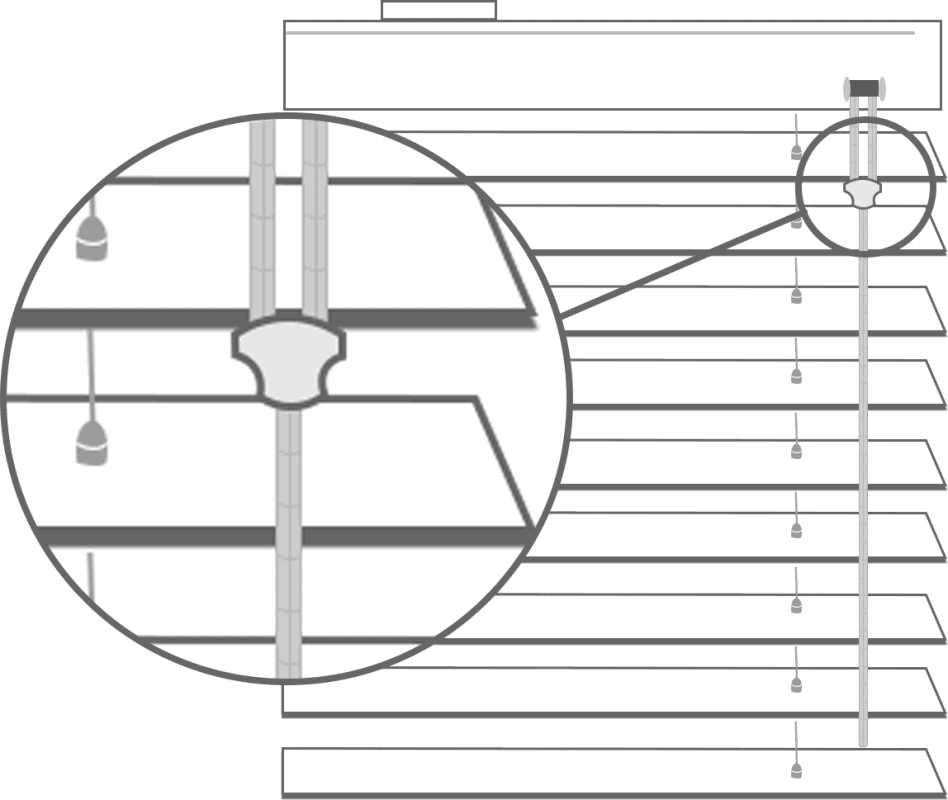
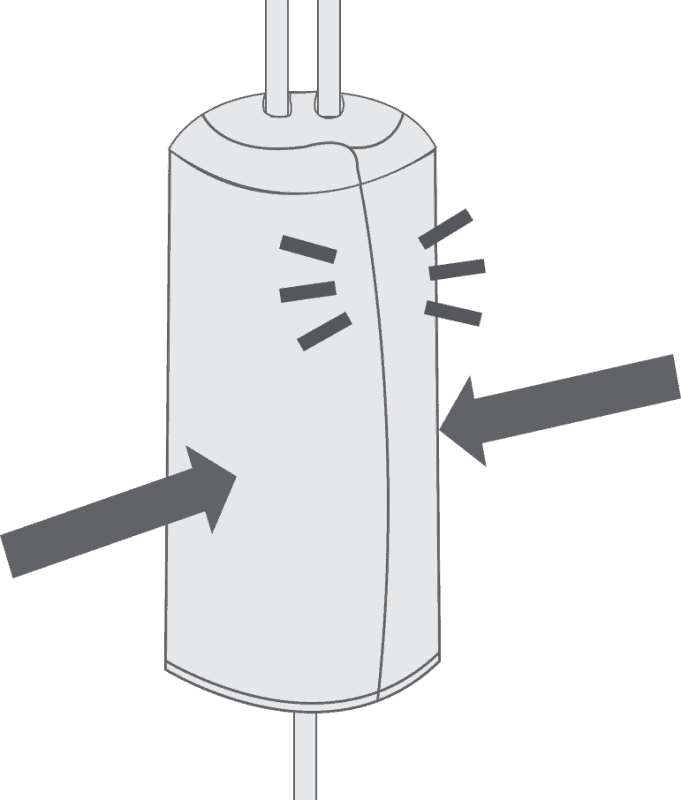
A breakaway cord condenser is pre-fitted to the lift cords so that when a horizontal force is applied to the cords entering the condenser, it safely releases the cords to eliminate any hazardous loops.

If any of the cords are pulled from the condenser…
Make sure the cords aren’t twisted or tangled
Then slot the cords into the notches on the sides of the condenser, ensuring the knots at the ends of the cords are tight.
Cord Safety Cleat
The safety cleat shall be installed as close to the headrail as possible and in all cases not less than 59.055 inches from the floor. The cord must be fully accumulated around the safety cleat(s) when the blind is not in use. Use the table below to determine the distance required between the cleats to fully accumulate the cords when the blind is fully raised.
| Drop of blind | *Distance between cord cleats(centre to centre) |
|---|---|
| 0.039-39.37 inches | 3.937 inches |
| 39.409-78.74 inches | 5.906 inches |
| 78.78-118.11 inches | 11.811 inches |
Place the safety cleat in the desired position on the wall and mark the positions of the holes with a pencil.

*Distance between cord cleats
(centre to centre)

Mark the hole positions and drill as required. Use the screws provided to attach the safety cleat to the wall.

Wrap the cords around the cord cleats in a figure of 8. When the cords are fully accumulated, ensure they are secure so that when any cord is pulled, no excess cord is released.
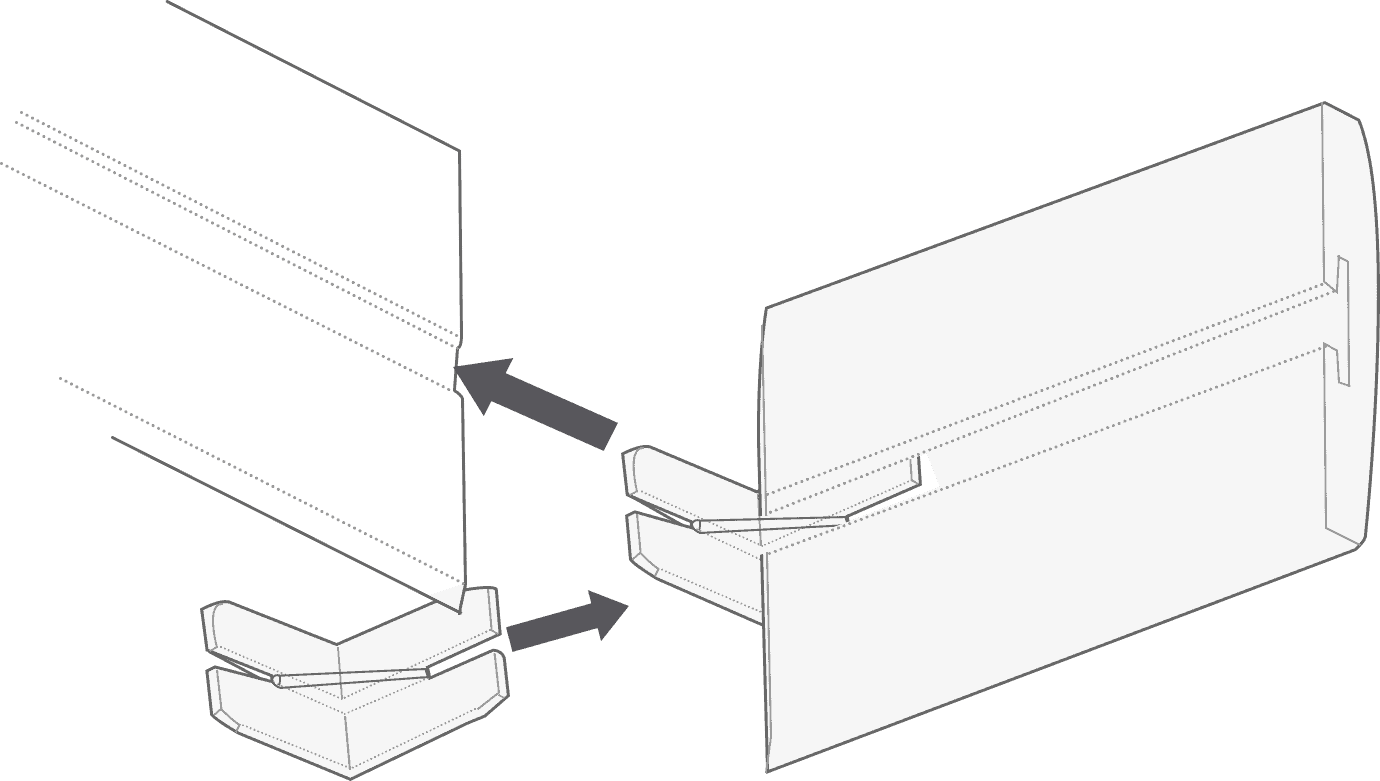
Additional Items
Hold Down Brackets
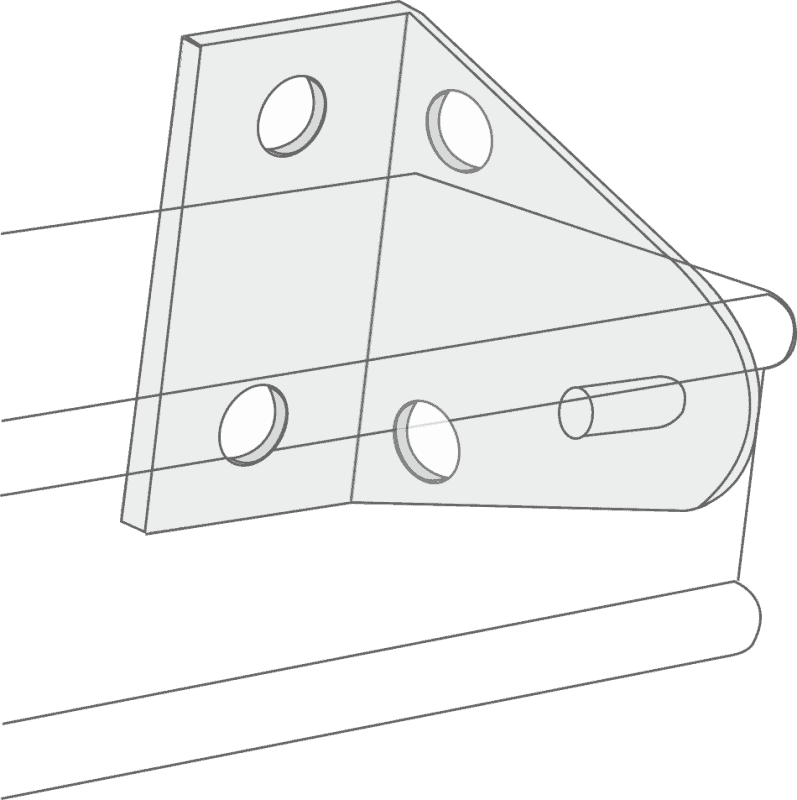
Two triangular, transparent brackets are supplied, which are used to hold the bottom of the blind against the fitting surface. These are only recommended for use when fitting the blind to a door, they are not usually required for window installations.
Installation Guide
Vertical Blinds
Fitting the brackets Step 1
There are two types of brackets for vertical blinds, each of which offers a different method of installation:
Top-Fixing
Use the single hole in the top of the bracket to fix to
the lintel (the ‘ceiling’ of the recess).
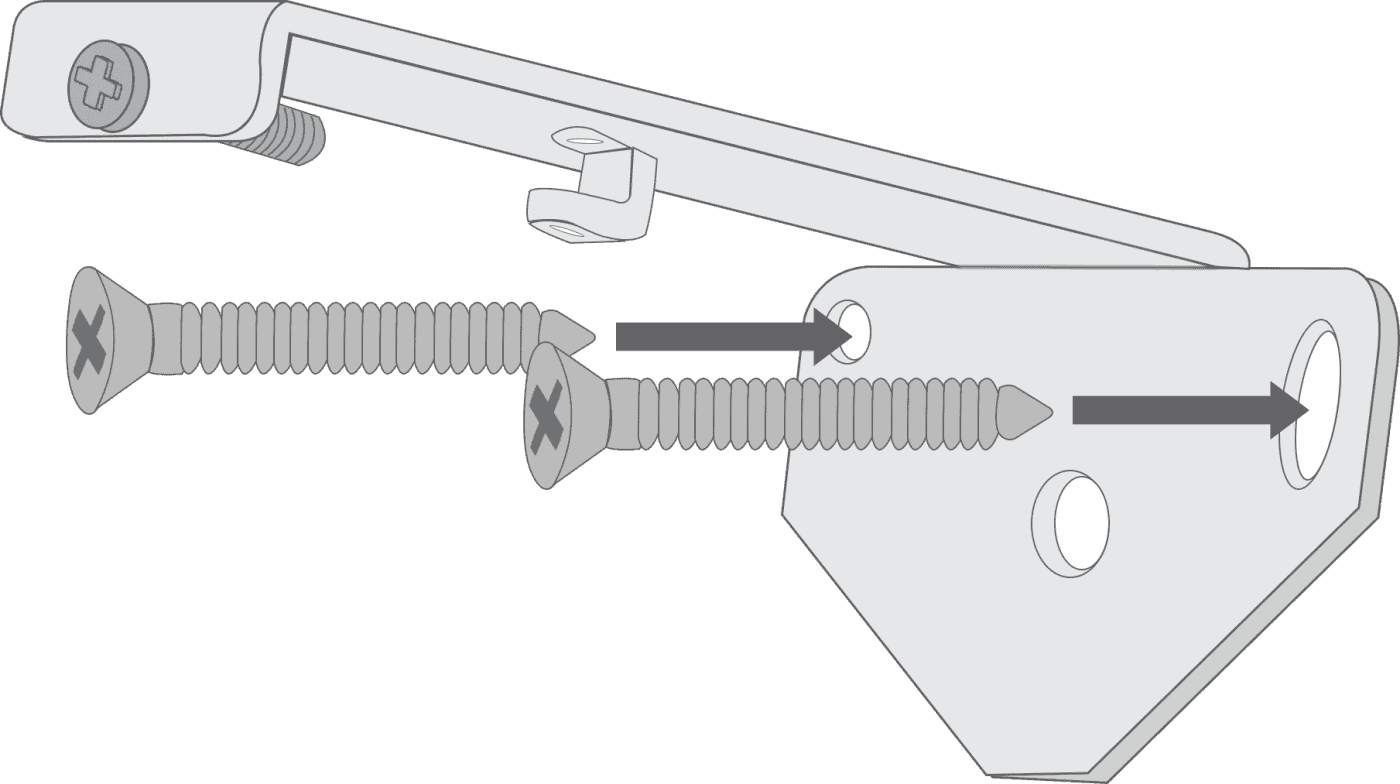
Face-Fixing
Use two screws through the back plate to mount
onto a facing surface (a wall or window frame)

Note that the position of the outermost brackets should be
at least 5cm away from the ends of the rail, with any other
brackets evenly distributed across the width
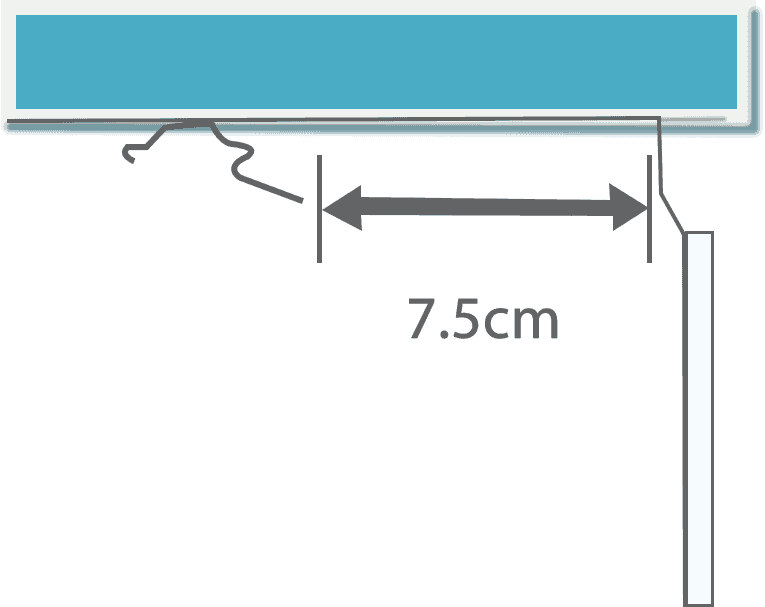
If you’re using top-fix brackets, make sure that you mount them at least 7.5cm in front of either
the window frame, or any protruding vents or handes, if there are any. This allows space for the
louvres to turn open and closed.
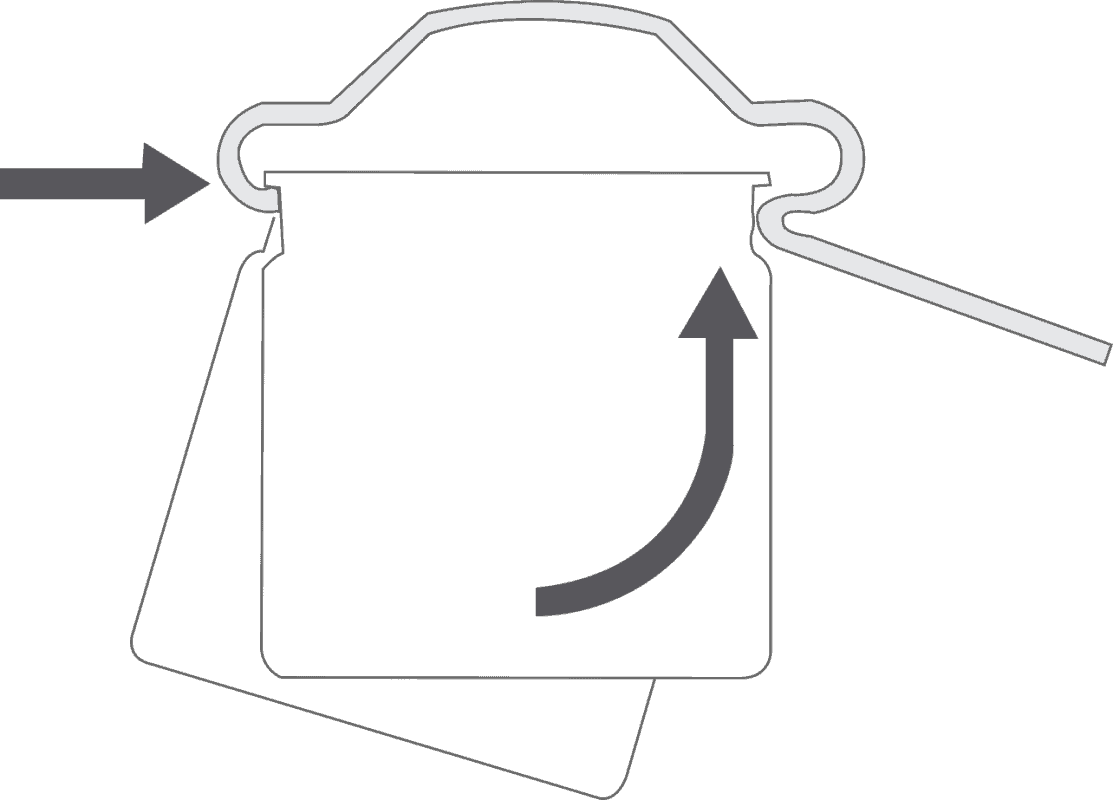
Fitting the blind Step 2
Top-Fixing
Situate the front lip of the headrail into the front of the
bracket.
Lift the back of the headrail and push up firmly to secure
the back of the rail into the bracket.
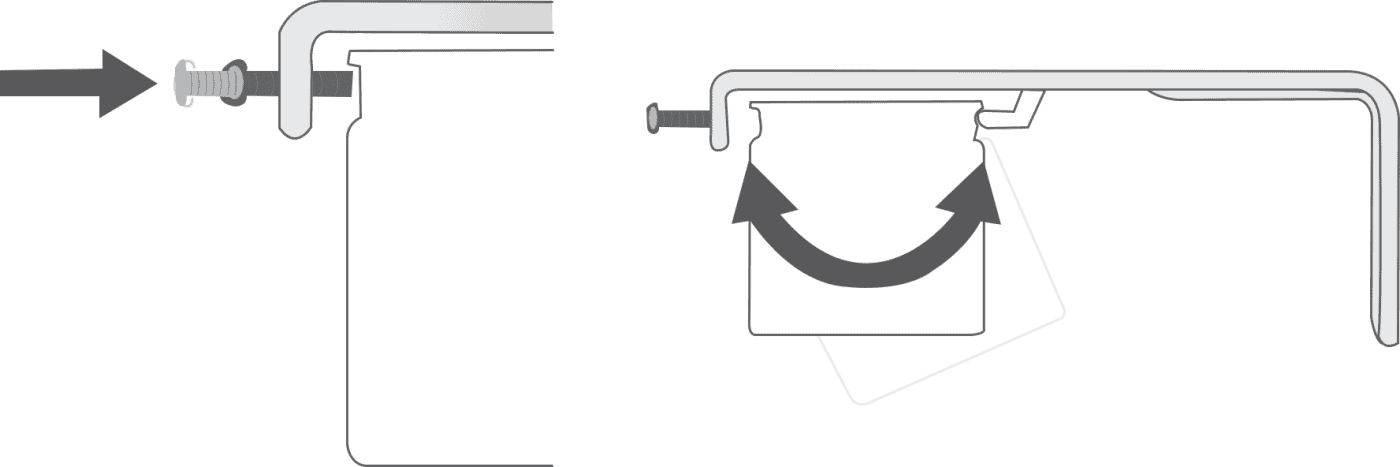
Face-Fixing
Situate the back lip of the headrail into the back hook of
the bracket.
Lift the front of the headrail so it’s level, then tighten the
screw in the front of the bracket to secure the rail in place
Child Safety Step 3
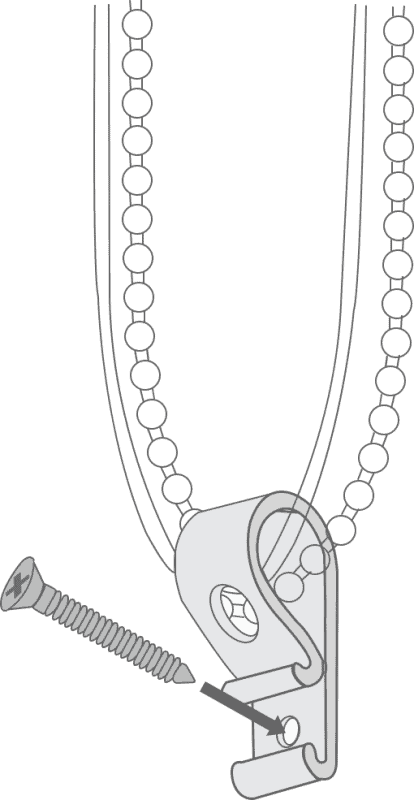
Cord Tensioner
Your vertical blind is fully compliant with the latest safety
standards. It has been supplied with a ‘P-Clip’ tensioning device
to keep the cords and the chain child safe.
Slot both the cord and the beaded chain into the ‘P-Clip’ and
secure it to the wall or window frame (if you are fixing to the
facing surface then the cord and chain will form a figure of
eight, this is fine and will not affect the operation of your blind).
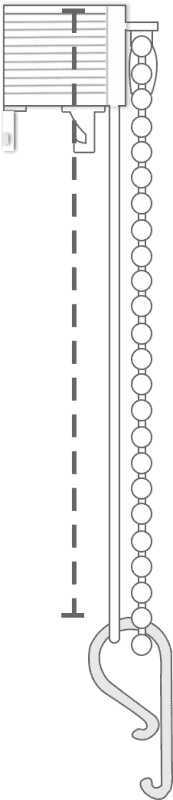
Top Tip
Please note that the P-clip must be installed. The cord must be kept under tension to prevent it from sagging down from the headrail when the blind is drawn open.
Position the‘P-Clip’ at themaximumpossibledistance,ensuring thecord and chainare taut.
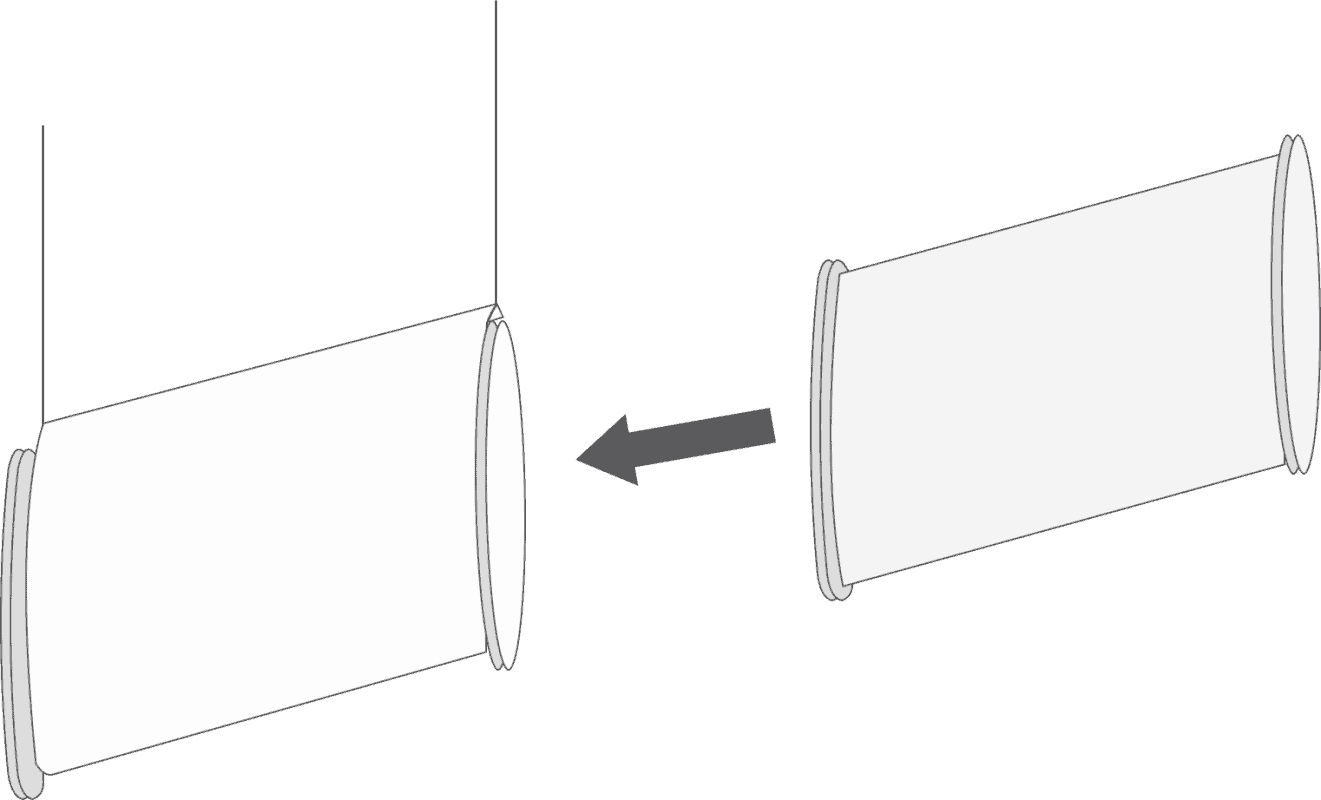
Hanging the louvres Step 4
Hook the louvres onto the rail.
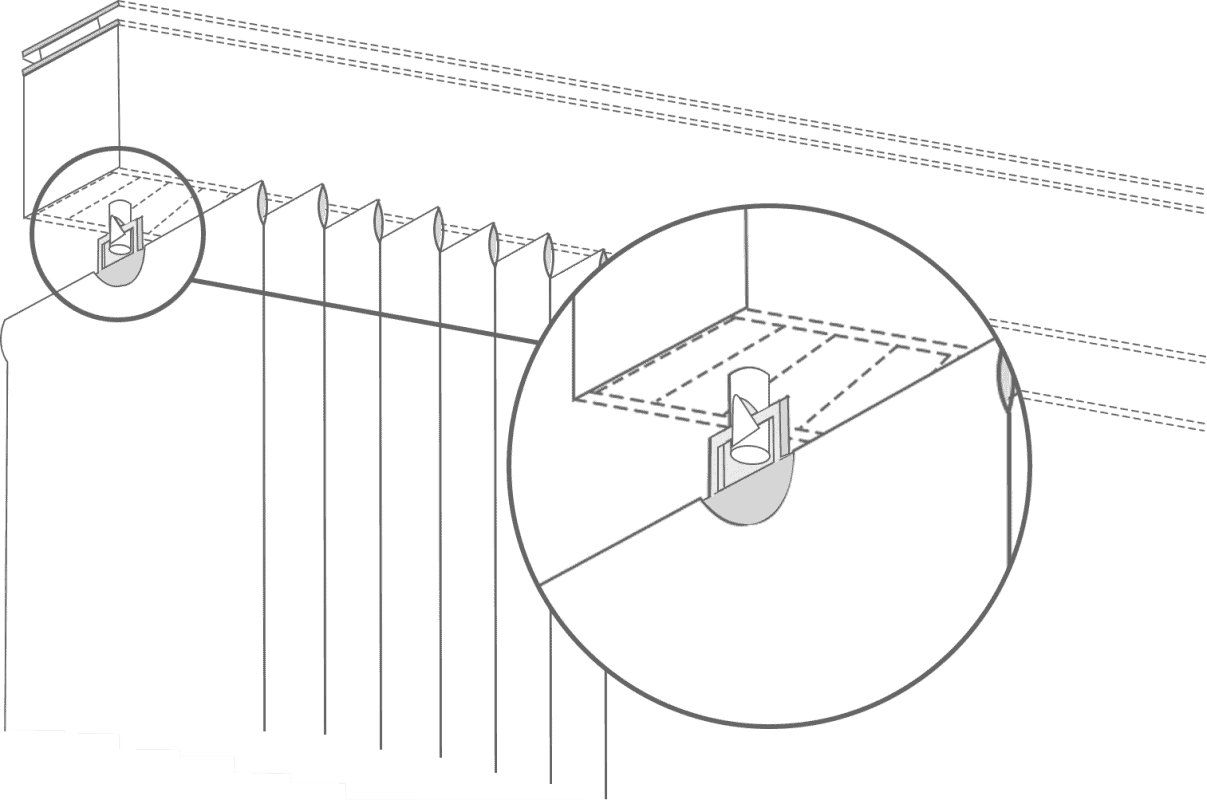
Slide the weights into the pockets at the bottom of thelouvres.
Roller Blinds
Before you begin
We will have positioned the controls where you requested during the ordering process. However if you decide to swap the side that they are on, direction of the roll or need to trim the blind further, the controls can be removed by simply unplugging them from the tube. This should be done prior to fixing the brackets.
Fitting the brackets Step 1
The brackets offer three methods of installation:

Top-Fixing
Where the brackets are screwed into the lintel (or ‘ceiling’ of the recess)
Face-Fixing
Where the brackets are screwed onto a facing surface (a wall or window frame)
Side-Fixing
Where the brackets are screwed into the side walls of the recess
Fitting the blind Step 2
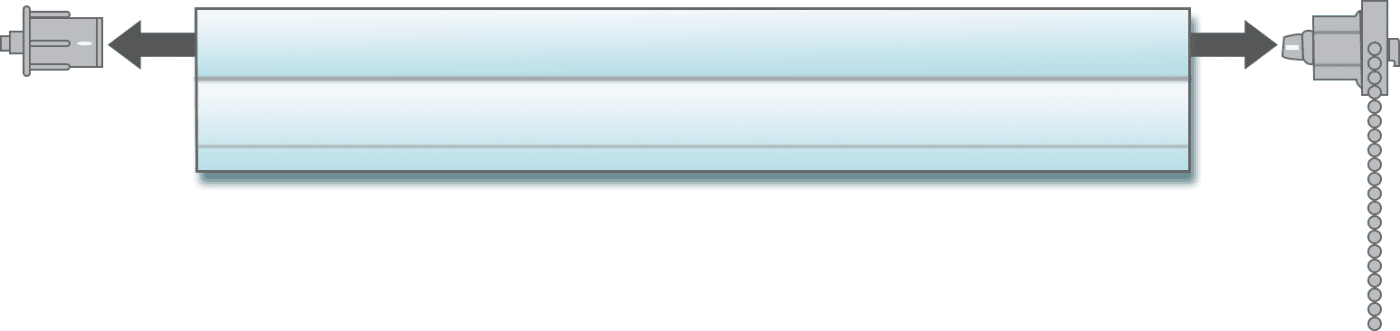
Locate the pin-end (the opposite end to the controls) of the blind into the central hole in the corresponding bracket.
Lift the control end of the blind and slot the rectangular ‘lugs’ into the corresponding slots on the bracket.
Child Safety Step 3
Cord Tensioner
The cord retaining device must be installed at the maximum distance possible from the control mechanism to prevent looped cords from becoming slack.
Place the retaining device on the wall and mark the position of the screw hole(s) with a pencil.
Attach the retaining device to the wall using the fixings provided.
Additional Information Step 4
Reverse rolling the fabric
Standard

Roller blinds can have the fabric rolled onto the tube in two directions. The first is referred to as a ‘standard’ roll. This will place the fabric closest to the window or wall so that it comes down at the back of the tube. This is typically used with blackout blinds when they are mounted outside of a recess, the standard roll meaning that there is less light leakage.
Reverse

The second method is referred to as a ‘reverse’ roll, which places the fabric so that it comes down at the front of the tube, effectively hiding the roll. This method will allow clearance behind the fabric, for window handles and other obstructions, if you’re mounting the blind inside a recess.

If you wish to change the roll method then it’s easy; simply pull the back of the chain to lower the blind, and continue pulling until the metal tube is exposed. Keep going and the blind will begin to raise, with the fabric now rolling up over the front of the roller tube. Note that this will reverse the direction you must pull the chain for raising and lowering the blind (you’ll now use the front of the chain to lower and the back of the chain to raise).
Installation Guide
Faux-Wooden Blinds
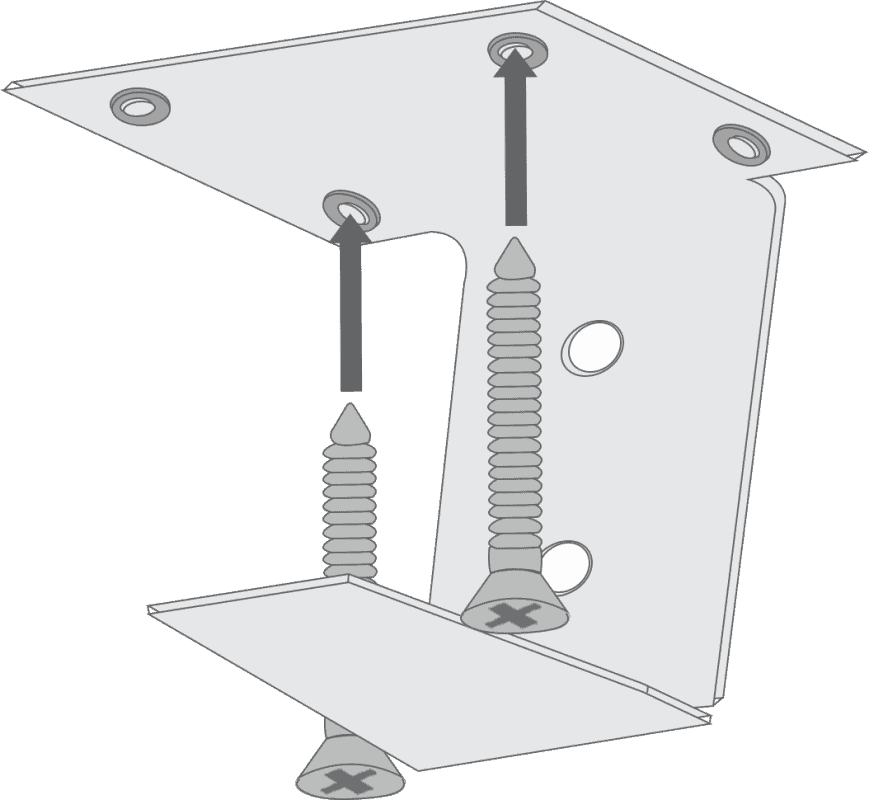
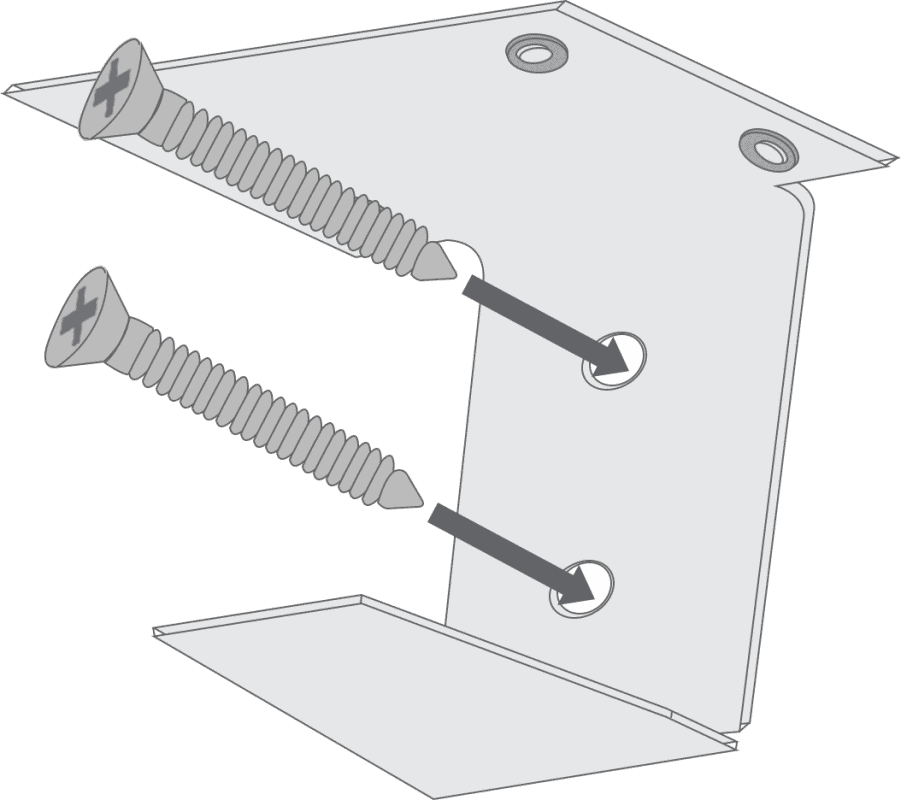
Fitting the brackets Step 1
The brackets offer three methods of installation:
Top-Fixing
Where the brackets are screwed into the lintel (or ‘ceiling’ of the recess)
Side-Fixing
Where the brackets are screwed into the side walls of the recess
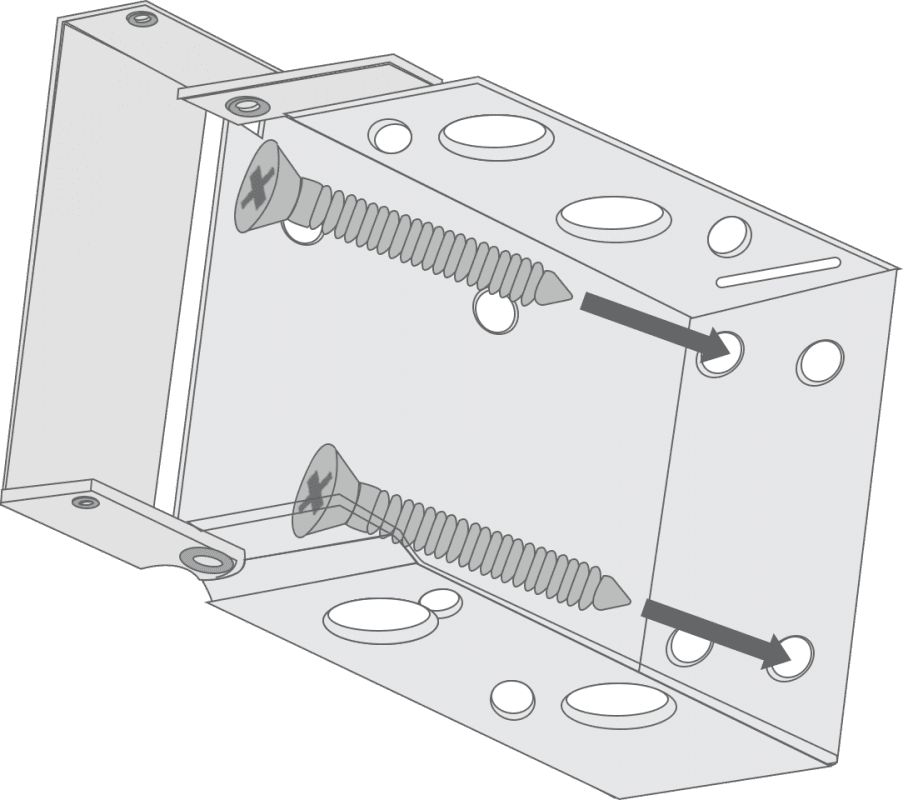
Face-Fixing
Where the brackets are screwed onto a facing surface (a wall or window frame)
Top-Fixing
Face-Fixing
Wider blinds will be supplied with support brackets. These should be positioned towards the centre of the window area in-line with the box brackets. Make sure that the position of the support bracket is clear of any cords coming out of the headrail. Support brackets can be top-fixed or face-fixed.
Fitting the blind Step 2
If you are fitting the blind inside a recess, go to step 3 before step 2.
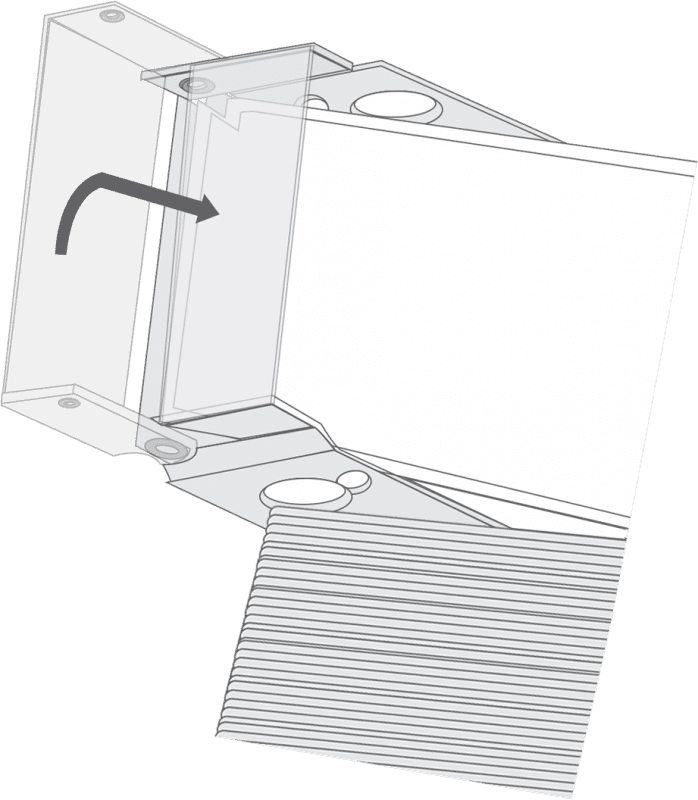
Lift the blind to the window and slot the headrail into the open brackets. Swing the hinged section of the bracket closed and press firmly until it locks.
Attach the winged clips to the rear of the pelmet and hook the serrated pelmet clips onto the headrail (if installing the blind within a recess, this should be done before step 2) so that both the serrated clips and winged clips are in corresponding postions on the headrail and pelmet. Then align the two clips with each other and apply gentle pressure to the front of the pelmet, directly over the clips to click them together.
Fitting the pelmet Step 3
Pelmets for ‘Exact Fitting’
If you’ve ordered ‘exact fitting’ then the pelmet will be sent wider and mitred at the ends, with additional end returns to cover the brackets. Use the ‘L’ shaped plastic brackets from your fittings pack to attach the side returns to the pelmet.
Child Safety Step 4
Cord Condenser
A breakaway cord condenser is pre-fitted to the lift cords so that when a horizontal force is applied to the cords above the condenser, it safely breaks away, eliminating any hazardous loops.
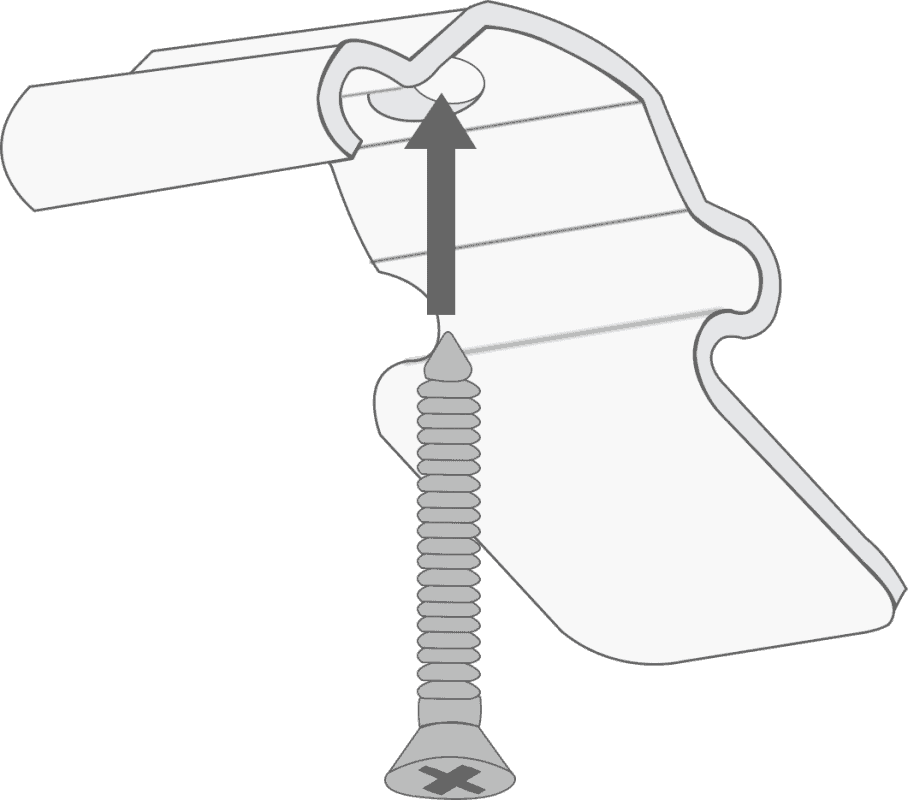
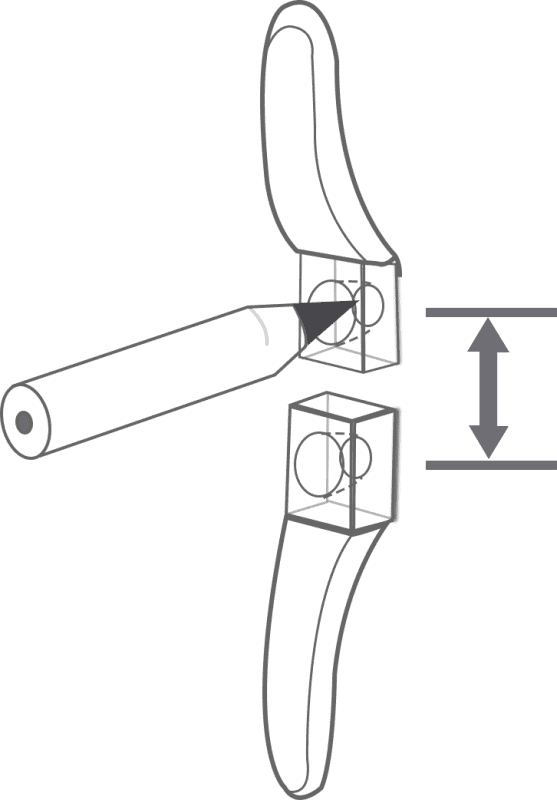
If the cord condenser is pulled apart:
Untwist the cords so that they’re nice and straight.
Slot the cords into the channel in the centre of one half of the consenser. If your condenser differs slightly from the diagram, don’t worry, just slot any cords that aren’t already tied into place inside in the same way.
Click the two halves back together, ensuring there is no loose thread trapped at the edges of the condenser.


Cord Safety Cleat
The safety cleat shall be installed as close to the headrail as possible and in all cases not less than 59.055 inches from the floor. The cord must be fully accumulated around the safety cleat(s) when the blind is not in use. Use the table below to determine the distance required between the cleats to fully accumulate the cords when the blind is fully raised.
| Drop of blind | *Distance between cord cleats(centre to centre) |
|---|---|
| 0.039-39.37 inches | 3.937 inches |
| 39.409-78.74 inches | 5.906 inches |
| 78.78-118.11 inches | 11.811 inches |
Place the safety cleat in the desired position on the wall and mark the positions of the holes with a pencil.
*Distance between cord cleats(centre to centre)

Mark the hole positions and drill as required. Use the screws provided to attach the safety cleat to the wall.

Wrap the cords around the cord cleats in a figure of 8. When the cords are fully accumulated, ensure they are secure so that when any cord is pulled, no excess cord is released.